Saturday, February 26, 2011

My Sewing Room |

Yesterday I made a new Valance for my "sewing room".

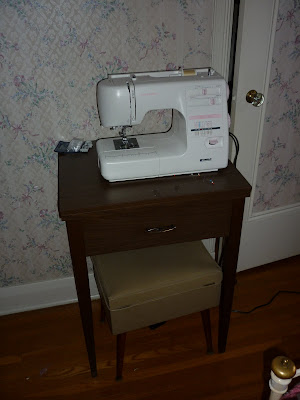
I put "sewing room" in quotations because it is not just my sewing room. It is technically a guest bedroom BUT since it has two big closets in it it is also my 'closet' / wardrobe room.

And recently I put my sewing machine in it.

The room came with a VERY floral wallpaper when we bought the house and it hasn't been a priority for us to change it yet. SO I brought in some of my old baby dolls / stuffed animals, put a pink quilt on the bed, made a purple 'sewing' themed valance and put my pink sewing machine in the room.

So I guess overall it is the 'Girly Room' in the house! :D --> Flowers, Clothes, Pink, Sewing, Dolls...

Thursday, February 24, 2011

Fabric Love |

It seems to be BABY SEASON. So many couples I know are having babies!

So with my new found love for Spoonflower Fabrics (see post below) I decided to do a post on baby fabrics!

I found some unique and someone unconventional boy and girl fabrics as well as some great gender neutral fabrics for those parents who are leaving their little one's gender a surprise!

There are SO many cute fabrics that I think I would create a room full of cute pillows for my baby with all different patterns on them so that I didn't have to choose just one!

Baby Girl:


Baby Boy:


Gender Neutral:


Check out the awesome fabrics on this site!
Spoonflower

Bridal Headpieces |

Check out my new bridal headpieces in my ETSY SHOP and watch the slide show below!

New Favourite Fabric Site |


I just discovered Spoonflower, an awesome fabric site with so many unique fabrics.

I Love it because:

- You can search for exactly what you are looking for

- Beside the fabric you choose they give you coordinating fabrics / fabrics from the same line --> making it easy to create a cohesive look.

- You can purchase the pattern you chose in a number of different fabric types.

- They have patterns that are pre-made quilt tops - all you have to do is cut out the patches and sew them together to make your quilt.

- They have awesome 'Calendar Tea Towel' patterns which are cute to make for gifts.

- They show 'projects' made by others using the fabric so that you can see what the fabrics look like.

- They link to real photos of the fabric on Flickr so that you can see the actual fabric/size.

- There is no trip to the store only to find that they don't have what you are looking for

- No more waiting in the long SLOW line ups at Fabricland!

Check it out!

Monday, February 14, 2011

Valentines 2011 |

We had a wonderful Valentines day weekend. We stayed at the Mornington Rose Bed and Breakfast in Stratford ON.

A weekend full of great food, lovely surroundings, roses and chocolate covered strawberries! A great first Valentines as husband and wife!

2 years ago today since we got engaged and 6 months today of marriage!

Dessert Ben made me for Valentines:

Roses, chocolates and chocolate covered strawberries at the B&B:

Saturday, February 12, 2011

I have been Featured on 'Polly Want A Crafter'...again!


My Valentines Fruit Arrangement project was featured on the Polly Want A Crafter blog!


Check out the post HERE


and check out my last project that was featured on Polly Want a Crafter HERE

Tuesday, February 8, 2011

Valentine Fruit Arrangement |

My Husband LOVES Fruit and has a new found love for DARK chocolate.

Because of this I looked into ordering him an edible arrangement for Valentines, but they were very pricey, so I thought I would attempt to make my own.

It worked our well and was fairly simple. On top of that he LOVED it and it was a great Valentine's Day gift!

Here is how I made mine:

Food Items that you will need --> 1 Pineapple, 1 Cantaloupe, 1 pack of seedless grapes, Straberries, Leaf Lettuce and a pack of chocolate chips (I used dark chocolate).


Supplies you will need --> Flower pot, Floral Foam, Wooden Skewers, Flower Shape Cookie Cutter and a Melon Baller.

Steps:

1. Slice pineapple as seen in photo (into 6-7 slices)

2. Use cookies cutter to make shapes.

3. Cut cantaloupe in half, clean out the seeds, and use the melon baller to create mellon balls.

4. Place pineapple and mellon shapes on skewers and arrange them evenly in the pot.

5. Slice the tops of the strawberries and stick them on the wooden skewers. Melt chocolate chips in the microwave in a glass measuring cup (easy to dunk in) and then dip the strawberries in the chocolate. Place them on a wax paper lined tray in the fridge for 10mins to firm up.

6. Place 5-6 grapes on each skewer (make as many as you think you will need for the size of your pot.

7. Fill in the edge of the pot with leaf lettuce to cover the floral foam before placing your strawberries in the pot.

8. Place your strawberries in the arrangement and then fill in around all of the fruit with leaf lettuce to hide the floral foam and the skewers.

9. Be sure to keep the arrangement in the fridge until serving - and be sure to make these the same day you wish to serve them.


Ben with his fruit arrangement - it was SO yummy!

Tasting the chocolate covered strawberries!

These fruit arrangements also make great centrepieces for the table and are yummy treats to pick at throughout the evening.
Consider having a fruit dip and even a chocolate fondue pot to go with the arrangement. This way you can leave the arrangements out on the table longer as if they don't have chocolate on them directly they won't melt.

Thursday, February 3, 2011

Artist Feature | Mindy Gledhill

Just came across the singer/songwriter Mindy Gledhill on Smitten Blog Design's website.

Love the song they had posted by her (below) and I checked out the rest of her work and it just got better! She has such a sweet soft voice and amazing lyrics. It seems like a record that would be a great lullaby choice for baby while still being enjoyable for mommy to listen to.

She has so many songs that would be great for my maternity, baby, engagement and wedding slideshows! Just might have to purchase her record! :D


Credit to Jed Wells for the design and Wendy Whitacre for the photography.

Wednesday, February 2, 2011

Hanging Photos Victorian Style|

In the background of various of my favourite Victorian era films I love looking at the decor, the wallpaper, the furnishings and the decorations.

One thing that I noticed that was consistent throughout a few of the films was that in this era they hung their pictures, paintings and portraits from ribbons and bows.

I loved this look and so I hung photos in my hallways in this style.

I purchased 4 different 4x6 frames from Homesense, non of which are made to hang on the wall, and then I attached black ribbed ribbon to each photo (by tying a not at the ends of the ribbon and slipping them under the hinges on the back of the frame). I glued and duck taped overtop of the ribbon on the back just to be sure the frames wouldn't fall.

I then tied little bows out of the same ribbon and put a small amount of hot glue on the back of them and stuck them to the end of the nail once the photos was already handing on it.
I got the "Home is Where Our Story Begins" wall decal from Dollarama for $2.00 and then I hung the four photos underneath it.

The photos are of our home in Spring, Summer, Fall and Winter. Before printing the photos I placed the season words on each of the photos in photoshop as well.

It gives the hallway a classic Victorian feel and being a small space the 4x6 frames don't overpower it.

Here are some photos of how it looks:


Here are each of the seasonal photos of our home:
Related Posts Plugin for WordPress, Blogger...

The Before & Afters of our Home


Home Improvements Slide Show

Click on the slideshow to open up a 'Gallery' mode where you can scroll through the images.

"Befores" - Images of our home when we bought it

In Front Of Our New Home!

In Front Of Our New Home!

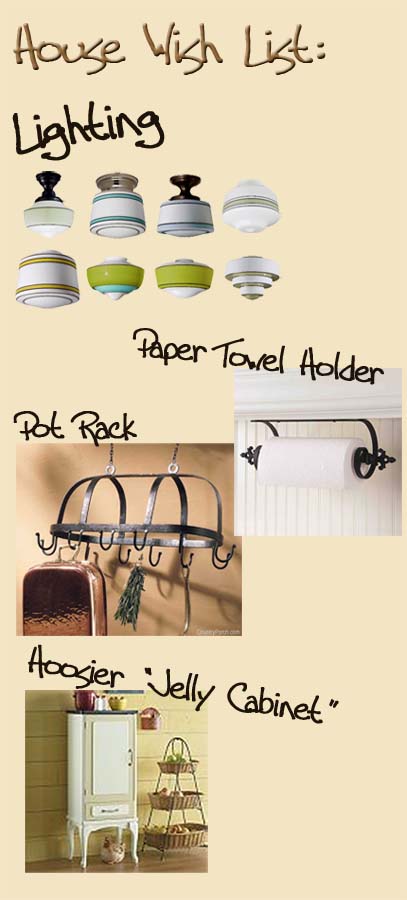
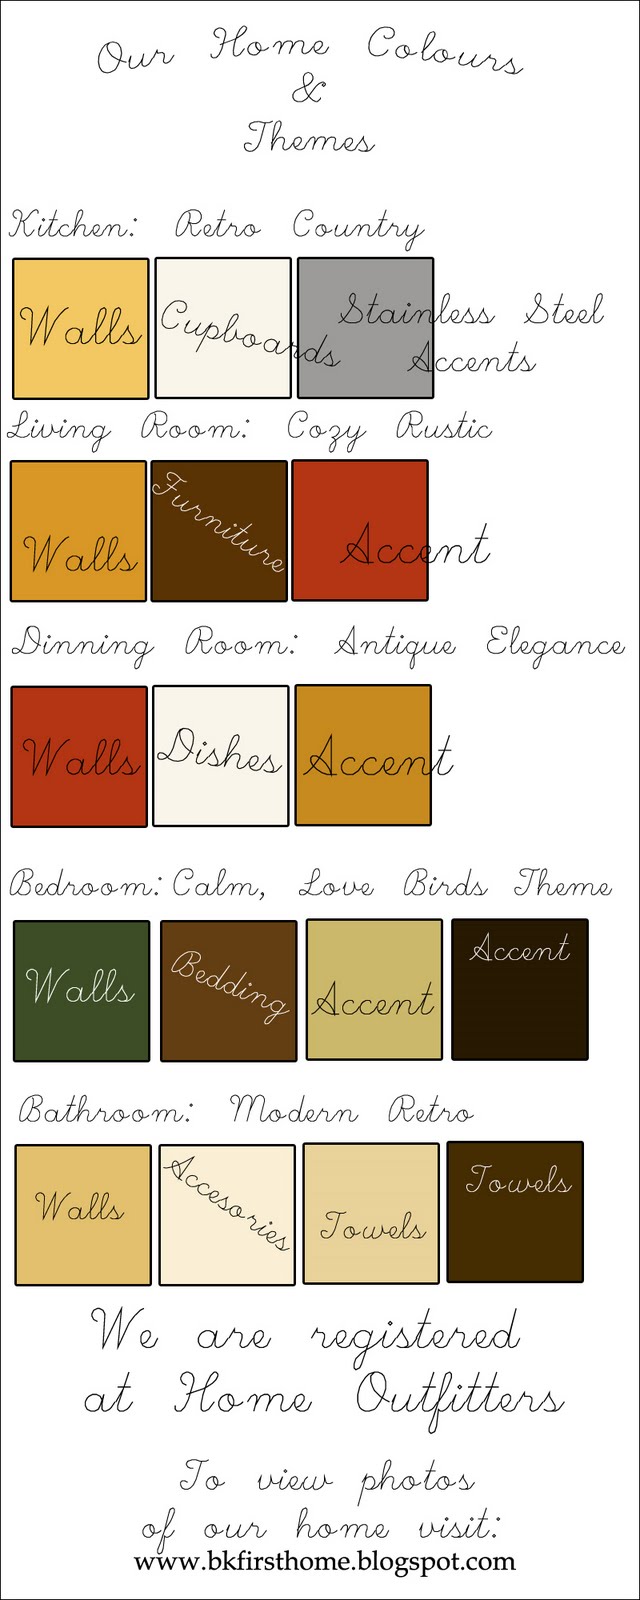
Wish List For Our Home:

Wish List For Our Home:

Our New Home Songs |