Monday, October 4, 2010

Fun with Fabric |

----


Fabric is definitely one of my weaknesses! It's very hard for me to pass by a pretty print without picking it up and admiring it!

SO I love when I have an excuse to actually purchase fabric for a project.

In my office I wanted to have lots of funky colour and texture, so I purchased cross stitch rings of all different sizes and stretched some lovely fabrics in them and hung them on the wall on either side of my bulletin board.


I purchased these fabrics while on our honeymoon in Huntsville at a little shop called 'Gone Quilting' and they are so pretty and vibrant!

Here is how the rings look on either side of my bulletin Board (which I also covered with a piece of fabric!)

Another idea is to hang the cross stitch rings at all different heights with long pieces of ribbon.

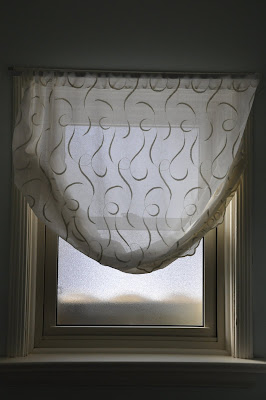
Hanging them from the ceiling over a desk will act like a room divider or handing them in a window will act like a curtain.

Floral Pumpkin Centrepieces

-------

Looking for an easy and inexpensive DIY centre piece for your table this Thanksgiving?

& don't we all want an excuse to carve out an ewey guey pumpkin once a year?


It's simple:

- Cut a hole in the top of you small pumpkin (the hole size should reflect the numbers of flowers / amount of foliage you have)

- Carve out the insides of the pumpkin (Don't forget to save the seeds to make a tasty treat out of them!)

- Line the inside of the pumpkin with a few shakes of salt (this will preserve the pumpkin for a longer amount of time)

- Choose to use oasis (for a more formal arrangement) or a freezer bag full of water (for a more country loose picked look)

- Gather flowers from your garden and fall foliage (leaves, branches, soy beans, wheat etc.) OR if you are a city gal pick up an inexpensive assortment of flowers from your local grocery store or florist.

- If you choose to use oasis simply soak it in water and cut it to size to fit inside your pumpkin, arranging the flowers and foliage as you wish by placing it into the oasis.

- If you choose to use a freezer bag, simply fill it with water and place it inside your pumpkin, inserting your fall arrangement into the bag.
- Choose to add a little extra to your arrangement by adding a fall figurine (like the mini scarecrow or mini corn as seen in the photos) or add ribbon around your pumpkin or place it on a fall patter or a bed of leaves.


Friday, October 1, 2010

Images to inspire your next day at home |

Draw A Dream... Read Something Lovely...
Get Crafty... Drink Something Sweet...

Pursue A Passion...
Bake Something Yummy...
"A life lived in love will never be dull" - so do what you love when you can

Perfect Picture Hanging |


I have always wanted to have family photos hanging on the wall going up the staircase, and we finally do!!

*
Hanging photos is never as easy as it sounds, especially when wanting them to look even on an incline, like a staircase.

*
SO to make it easier for myself I cut templates out of newspaper that were the same size as each of the photos.

*
I then hung these templates with tape in order to easier 'eye ball' if they were at the right height and distance away from each other!


*
And, without using a level OR a tape measure I was able to hang them perfectly.
I definitely recommend the 'template' route, especially when doing groupings of photos, as even though it takes a bit more time up front, it saves time and frustration in the long run.


An example of hanging photos using paper templates:


My Final Product:


Grouping of our Wedding Photos in the Living Room:

New Dinning Room Table |

------
I am SO thrilled with our new dinning room table!
We found a small Mennonite vendor, 'Truly Wood Furniture', at a local flea/farmers market here in London ON.
This table was on clearance and came with the 6 beautiful chairs. It came with two leaves so it can be either 5ft, 6ft or 7ft, fitting 8 chairs in total!
It is a rustic style table having cuts, dents and chisel marks in it from when they were creating it.

It looks GREAT in our dinning room! I can't wait to have a big group over to use it!

Tuesday, February 2, 2010

New Bathroom Decor!

---

The main bath floor was a blue green colour and since I had always wanted to to a beach themed bathroom I decided to use some of my photos from the trip I went on with my mom to Rhode Island, along with beach glass, stones and shells that I have been collecting forever: some from my family's trip to Dominican, some are from Rhode Island, and a lot of the beach glass is from the great lakes!


Before - View 1 :


After - View 1 :


Before - View 2 :


After - View 2 :


Before - View 3 :


After - View 3:


Before - View 4 :


After - View 4 :


Details:

New Floors!

---
Photos of the new floors!

Great Job Ben, Dad and thanks so much to Shane and Mom for all their help too! We couldn't have done it without you! :D

See the 'Befores and Afters' in the 'Renos' Slide Show Below! :D

Dinning Room:


Living Room:


Hallway:

Related Posts Plugin for WordPress, Blogger...

The Before & Afters of our Home


Home Improvements Slide Show

Click on the slideshow to open up a 'Gallery' mode where you can scroll through the images.

"Befores" - Images of our home when we bought it

In Front Of Our New Home!

In Front Of Our New Home!

Wish List For Our Home:

Wish List For Our Home:

Our New Home Songs |