Monday, April 11, 2011

Creative Mommy | Janine Costello


This is Janine and her adorable son Isaiah!

Janine is a
GREAT example of a "Creative Mommy on a Budget" as she has completed many beautiful DIY projects to giver her son's nursery a unique, custom, homey and inviting feel that looks so high-end but is in-fact DIY on a budget. She has also created some adorable clothing items for her son that make him the most stylish baby in town!

Below are photos and descriptions of her awesome projects! And be sure to see the photos at the end of the post of how the overall nursery came together!

Baby Quilt|

I bought half a meter of 6 different materials, and two meters of a solid material for the back. I also bought piping for the edges. I cut the squares 6x6 and arranged them all on the floor. Then starting at the top I sewed row by row. I then cut the back panel 3 inches larger than the front panel on all sides. I placed quilt batting between the two layers and attached the edges of the back to the front using piping. I then top-stitched about one inch from the edge.

The material was about $10 a meter on average so I spent about $50 on material, $15 on piping, $7 on batting and $3 on thread. So the total for this project was about $75. However, I had extra material left over that I was able to make other projects for the nursery with.

I used ideas from three different quilts I found online to create mine, taking different aspects that I liked from each of them. They ranged from $120-$200 in cost!

Savings: $175.00!

Jungle Paintings|

I found a picture of similar paintings on the Internet and printed it off.
I bought 3 white canvases and drew the pictures directly onto each canvas and then painted the pictures.

The cost was $10 for the canvases (I already had paint and brushes).

Similar paintings retail for about $50 for the collection!

Savings: $40.00

Wooden Baby Name Letters |

I purchased the letters for my son’s name at Dollar Giant and painted them green. I bought brown ribbon from Walmart and cut 1-foot pieces (2 for each letter). Using a hot glue gun, I glued one end of each ribbon to the back of the letters, so each letter had two long pieces hanging off. I then tied the two pieces in a bow.

Buying custom wooden letters online cost anywhere from 6$-8$ per letter which would mean Isaiah's name would cost on average $42.00 plus shipping!

Savings: $32.00


Toy Sling |

I used left over material from the quilt to make this awesome Toy Sling for the side of Isaiah's Crib.

1. I sewed two large half circles together, leaving the flat edge open.

2. I took 2 long pieces of material (about 4 feet long each) and folded

them in half (pretty sides together) and sewed along the open seam

3. Then, using a safety pin, I pulled the material through so the right sides were facing out making 2 tubes.

4. I then attached piping to each side of the half circles’ open edges.

5. I centered and pinned the tubes on the half circles so about 1 foot of material was hanging from each side.

6. I attached the tubes to the other side of the piping. The tubes work as the ties to attach the sling to the crib.

Since I used leftover material the cost was $0!!

However, about 1 meter of solid material would be needed for the sling and approx. half a meter for the ties and some piping. So it would around $15-$20 to make if you have to buy the material.

Toy slings cost about $60 at Sears.

My Savings: $60.00!

Your Savings (if material needed to be purchased): $40.00

Personalized Laundry Bag |

My son had no place for dirty laundry in his room, so using leftover material from the quilt, I sewed a large drawstring bag.
I personalized it by adding a block with the letter “I” for my son’s name.
I top stitched the block and letter on to the bag.

The cost of the project was $0 as I used scrap material!

However it would probably cost around $10 if one had to buy the material.

Handemade Baby Laundry bags on Etsy cost $40.00 on average.

My Savings: $40.00

Your Savings (If materials need to be purchased): $30.00


Snake Stuffed Animal |


For Valentine’s Day I decided to make by son a homemade gift.
I had left over material from curtains I sewed for his room, the material reminded me of a snake, and since his room was jungle themed I decided to make him a giant stuffed snake.

I cut two long pieces of material in the shape of a wide snake. Then placing right sides together I sewed the pieces together but left the mouth opening un-sewn. I then top stitched a heart on the side of the snake and hand stitched the eyes on (I used beads). I then took 2 pieces of material and sewed a tongue and attached it to the center of the mouth. I then stuffed the snake and hand stitched the mouth closed.

This project would cost approximately $10-15 for material and stuffing.

I found a similar Snake Sutffed animal on Etsy for $19.00 plus $12.00 shipping ($31.00)

My Savings: $31.00

Your Savings (If material needs to be purchased): $21-$16


Little Man's Hat & Tie |


For Easter I wanted to dress my little boy up for church. So I decided to make him a hat and tie.
I bought a pattern on Etsy for $8, the pattern included both the hate and tie.
I found the patterns to be VERY easy to follow taking me about 3 hours to complete both projects.

The cost was about $20 total, for the pattern, material and notions. I purchased the amount of material recommended by the pattern and have PLENTLY left over so I plan to make some hats and ties for gifts in the future.

To buy a hat and tie like this would be an average $40.00

Savings: $20.00


Tie Onesie |


I bought a package of plain white onesies and using left over material from another project cut the material in the shape of a tie.
I then zigzagged the “tie” to the onesie.
VERY easy to make.

I have seen these sold at craft sales and mom to mom shows. They usually cost between $10-20. I bought a package of 6 onesies for $12 and used scrap material for the tie. So the cost per shirt was about $2 a great gift idea!

Savings: $10

Brown Dress Pants |

I had left over material from the hat and decided to make matching pants. I bought a pattern from Etsy, the pants were VERY easy to make, taking less than 2 hours.

I added a blue trim to the pockets to match them with the tie and hat I had already made.

The pattern cost $4 and I bought elastic for the waistline.

Using left over material this project cost me $5. Most baby pants cost about $15.

Savings: $10


My Total Savings on all of these awesome DIY projects: $418.00!

WOW Janine, you have done a fabulous job in creating some awesome, custom & unique items for your sweet baby and I am sure you are an inspiration to young moms everywhere showing them that they can DIY on a budget to get high end looks for their babies at a lower cost.

I am sure Isaiah will grow up knowing that he is truly loved and cared about because of all of the time and effort you put into hand-making all of these items especially for him!


Check out Janine's Blog HERE

Thursday, April 7, 2011

Creative Business Woman | Carolyn Hayes


Carolyn Hayes of Seyah Photography is a Creative Business Woman on a budget!

This post is an exciting feature for fellow photographers to read as gives us insight into Carolyn's studio setup and highlights the products that she uses to create some super cute, high end looks...on a budget.

Carolyn's photography set looks like it consists of very expensive flooring that would have taken a long time to create with high baseboard trim and fancy wallpaper, BUT below she describes how easy and inexpensive this awesome look is to create!

First lets take a look at a few of Carolyn's awesome photos taken using the backdrop setup she describes below:

Here are two adorable little girls in front of her backdrops:

And here is a sweet photo of
Carolyn's dog also in front of her great looking backdrop:


Here is how she does it!

A Description of Caroyln's Studio Setup:

My studio is a two room in- home studio that has only one room in use at the moment the other is in the process of being renovated. Once it is fully renovated my studio will have a customer bathroom and it's own entrance into the studio so customers don't have to go through our dinning room.

My Studio set up consist of backdrops hung in various way, two plain backdrops are hung with a pole and a chain from Henry's that makes it easy to pull up and down, the other backdrops I clamp to a pole that is attached to two stands, then the baseboard is clamped onto the backdrop and the floor is layed. My backdrops are paper an
d canvas. The plain black and white ones are paper and the fancy one's with designs that look like wallpaper and wood flooring are canvas. The canvus backdrops are very reasonably priced are from a company in the states. The good thing about canvas backdrops is they are durable and clean very easy, get a little messy during a newborn shoot you can just wipe them off, unlike paper and material backdrops.

I also use blankets as backdrops and also clamp them to a pole with the two stands. I am looking into getting some material to make my own backdrops a
nd also to make diaper wraps for newborn shoots. You can get small pieces of material from Walmart for under $10.00 and they are the perfect size just to tuck into newborns diapers during a shoot.

As for props, some of the props I order from Etsy, and the props that I want that are to expensive or look easy to make I simply make myself (sometimes with the help of my boyfriend) right now we are in the process of making a white picket fence for my
upcoming Easter shoots. I also make some of my own headbands.

Photography is one of the most fun and rewarding professions out there.

- Carolyn Hayes

Some photos of Carolyn's Studio Setup:

A pull back shot of the studio

Additional canvas backdrops rolled up easily for storage


Storage unit containing props and equipment for my sessions

As you can see, you can have a successful home photography business and you can put together really high end looks on a budget.

By making her own props/sets, by finding deals on backdrops that look like real wallpaper and flooring, and by having her office/studio in her home Carolyn has definitely done an amazing job of being a 'Creative Woman on a Budget'!

Thanks so much for sharing a 'behind the scenes' with us Carolyn!


Carolyn's photography business serves Hamilton ON and the surrounding areas.
www.seyahphotography.ca
www.seyahphotography@hotmail.com
905-541-7346

Creative Bride | Lauren Brown

Lauren is a newly married bride from Florida!
She and I met online via my personal wedding blog while planning our weddings at the same time.

We were both budget conscious DIY brides and were able to share ideas with each other.

Since our weddings we have both been able to use the ideas and projects that we came up with for our own weddings and now turn around and create and sell these various wedding items to others!

There are lots of brides out there who LOVE the look of DIY but don't have the time to create it for themselves. So creative women like Lauren are able to give these bride's the custom DIY flare they want for their wedding days without the time and effort involved in producing it!

Wedding Wishing Wands!

(so fun to say!)

Here is one of Lauren's DIY wedding projects on a budget that she now sells in her ETSY shop

Lauren's Description of her project:

I wanted something different as an exit at our wedding. I didn't want the typical rice being thrown in my face or being covered in sticky bubbles. I came across this DIY project online to make wishing wands and thought it was such a neat and fun idea, especially for children and guests!

I purchased dowel rods, gold paint, ribbon in my wedding colors (pink and ivory), and glue sticks for my glue gun. I hand painted each dowel rod (over 250!!!!) and had my "now husband" start cutting the ribbon. I used 4 ribbons on each dowel rod, 2 pink and 2 ivory. I used the glue gun to put glue around the edge of the top of the dowel rod and tied the ribbon in a knot.

It was a very simple and easy project! Probably one of my favorites! That was a lot of fun!

* The above photo is of Lauren and her groom on their wedding day with their guests waving the wedding wands upon their exit!
It looks GREAT! *

Want Lauren to make you personalized 'Wedding Wands' for your Big Day?
Click HERE to find them in her Etsy Shop.

Lauren is also a photographer serving Bristol Florida and the surrounding areas!
Check out her photography facebook page HERE.

Thanks for sharing your creative wedding DIY project with us Lauren!

Creative Quilter | Debbie Lindsay

Debbie's work is the exact essence of my 'Creative Women on a Budget' post series because her quilting style is what she refers to as 'ScrapPileStyle'.

What exactly does this mean?
Well Debbie creates quilts and also designs and sells patterns that are written to assist quilters to create projects utilizing their leftover fabrics.


Debbie's work is impressive for several reasons:

1. One of Debbie's designs, the “Circa Charmer” (pictured below), was recently published in the Oct/Nov 2010 issue of “The Quilter” magazine. This quilt was designed with reproduction fabrics from the circa era and is a quilt style that would utilize a quilter's stash...to make a beautiful frugal quilt.


2. Debbie has an ETSY shop called
'Scrap Pile Styles Patterns'
where she sells her patterns and some of her DIY projects
sharing this style of quilting with others.


3. Debbie is currently working on publishing her new book "Quilting with Scraps" and she has gracefully shared the introduction to this book with us!
(Read this introduction at the bottom of the post).


Here is a description of one of Debbie's ScrapPileStyle projects:


Cabin Trails Placemat - Skill Level: Easy

This log cabin block placemat is simple and fun to make, with only strips to cut, assembly of this placemat is quick, as sections are cut to length as you attach them. Purchase pre-cut strips or dig through those remnants my detailed instructions will walk even a beginning quilter through all aspects of quilt making with specific instructions that teach how to make and attach your own binding using either square and mitred corners – A potential stash buster project!

- Debbie Lindsay


Why Debbie has a passion for this budget friendly DIY Style of quilting:

"I grew up in the scrap box of my mother’s sewing room, dressing up dolls, dogs and little brothers, completing my first quilt at 16.

A career in financial management, attending college, a family business, and three small children continually outgrowing clothes; piecing scraps together became a way of life. The art of fabricating treasured gifts from remnants became a passion. Wedding and baby quilts have become cherished gifts, each creation stitched with memories, prayers and love.

My lifelong passion of quilting and “making the most of” leftover fabrics inspired me to share this gift by providing patterns that appeal to quilters of every skill level. Simplifying the steps of the process with reference charts and instructions I walk quilters step by step, as they utilize the resources of their scraps, creating unique quilting projects – ScrapPileStyle."

- Debbie Lindsay

The Introduction to Debbie's upcoming book:

Quilting with Scraps...

A Scrap Management Resource with guidelines, techniques and interchangeable patterns.

Leftover fabric is described as: scraps, bits & pieces, a stash, remnants, leftovers, waste, surplus, extra, remaining, additional, excessive I prefer to think of them as essential potential thrifty projects. In todays go green world, making use of leftover material is not only appealing, but in keeping with the reduce, reuse and recycle philosophy. Women when faced with hard times found it a necessity to piece every last bit of fabric to create necessities. Fortunately today, most of us are not faced with such devastating hardships; we are however exposed to the adversity of rising costs and overflowing landfills. Learning to utilize leftover remnants is the art of being innovative, frugal and environmentally conscious, reminding us of our grandmothers words waste not, want not.

You will find a broad range of unique and exciting projects; small enough to complete in a reasonable time frame, but large enough to use up some of those highly treasured leftovers! The question becomes what can we do with these remainingexcessive pieces of fabric. This dilemma, in essence, was the inspiration that motivated me to put together a book with a unique selection of inspiring quilting projects that walk the reader through an assortment of interchangeable patterns with numerous variations as I demonstrate the potential in utilizing that untapped resource of scraps.

You will find this book an indispensable resource of guiding principles, interchangeable blocks, multiple layouts, finishing options and techniques along with strategies for organizing and integrating scraps into a variety of intriguing projects. Unique, as it guides quilters through the concept of creating their own pre-cuts and project packages. Charts for fabric calculations, binding estimates and guidelines for quilting “scrap pile style”, along with instructions for adaptable finishing and border techniques all clearly outlined for some 38+ quilting projects. From potholders, table quilts and cloths, placemats, pillowcases, front door decor, lap and crib quilts and my most popular “Block of the Month - Scrap Pile Style Quilts”, I’m sure you will find these and many more treasures to quilt out of those colourful, excessive leftovers from that ever overflowing corner in your sewing room.

"How do you ScrapPileStyle?"


Interested in ordering one of Debbie's patterns?

Click HERE to visit her Etsy Shop
Have a question for Debbie?

Email her at |
debbielindsay57@gmail.com

Friday, April 1, 2011

Our Garden Plan 2011 |

My friend Christie (author of the Listening blog) passed on the neatest program/website to me called GrowVeg.com!

It is an amazing software that allows you to plan out your garden space quickly and easily. It is great for beginners as it shows how much room each plant requires and has all of the information you need about the veggies you might want to grow.

It gives you information about when to plant (i.e. frost dates) and even gives you a final print out of all of the vegetables you selected for your garden and you can use this list as a guide for what to purchase, when to plant and when to harvest!

They even have a 30 day free trial so that you can see how the program works and find out about your veggies and get an overall idea of what you can plant with the space you have.

Here is how my garden turned out! I am so excited to get started planting!

Coming Soon to a Blog Near You (this one) | "Creative Women On A Budget"


I have so many creative friends that I wanted to do a post about their most recent/favourite DIY project that they did on a budget.

I wanted to showcase their creativity, share their ideas, get inspired by the various projects and to be reminded that when we women put our minds to it we can create something AWESOME on a BUDGET!

Many of these women don't have their own blogs because, lets face it, blogging is a very time consuming process. SO I thought this would be a great way to share their ideas/projects for those who don't have the time to "BIY" (Blog it Yourself) hehe.

I am looking forward to seeing some of the projects that get sent in.
If you are interested in sending me your project simply Email me your photos and a description of your project and/or steps on how you created it to: ko2_photography@hotmail.com
please send me your ideas by April 10th :D


Anything goes! Whether it be a seasonal craft, decor item, home reno, card, gift idea etc.....

DIY Party Tray |

I am having a family BBQ this summer in honour of my husband's birthday and I wanted a three tier tray to stack some goodies in, and OF COURSE I wanted it to match the party's theme so I decided to make my own.

I found these cute plastic dishes at Dollarama and thought they would make a great three tier tray and the colours and patterns were great for an outdoor, green themed, party!

I simply purchased two small glasses to use as the separators but you can use anything tall and skinny such as candle sticks to separate the tiers and can even find them at thrift stores and paint them in the colour you need them.

I simply glued the top and middle dishes to the glasses using contact cement (also purchased at Dollarama). I chose not to glue the rim of the glasses to the platters so that the tray can come apart and be easily stored and washed.

SO for $5.00 I got a really cute party tray that matches my theme!

Supplies Needed:

Glue the dishes to the top of the glasses/candlesticks with contact cement.


The finished Product!


You could use glass dishes as well for more fancy indoor events.
Here are some other DIY Party Trays for more ideas


My friend Ellyse made this adorable tray below using tea cups and saucers!! Such a cute idea, and boy do those cookies look yummy too!


A Cute and Colourful Party Tray with Glass candlesticks used for separators made by 'The Crafting Chicks'
. They displayed Easter goodies on their tray! To see more images and their 'How To' check out this Link


Hand painted Glass trays found on the Tatertots & Jello Blog


A three tier tray also found on the Tatertots and Jello blog - Made using three spray painted plastic 'silver trays' from the dollar store along with thrift store spray painted candle sticks.


This three tier square tray is really neat too. I LOVE how they used Ice Cream Sunday glasses to separate the tiers. Check out more images and get the 'How To' on Just Sew Sassy's Blog.


These DIY Trays are really cute as they have vibrantly coloured trays, purchased at Target. Check out the post on The Speckled Dog Blog to see how they were made!


Related Posts Plugin for WordPress, Blogger...

The Before & Afters of our Home


Home Improvements Slide Show

Click on the slideshow to open up a 'Gallery' mode where you can scroll through the images.

"Befores" - Images of our home when we bought it

In Front Of Our New Home!

In Front Of Our New Home!

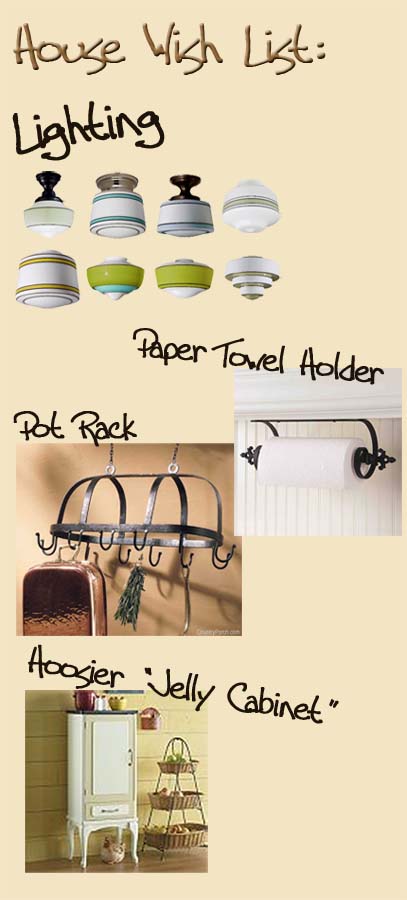
Wish List For Our Home:

Wish List For Our Home:

Our New Home Songs |