Showing posts with label handmade. Show all posts

Wednesday, February 2, 2011

Hanging Photos Victorian Style|

In the background of various of my favourite Victorian era films I love looking at the decor, the wallpaper, the furnishings and the decorations.

One thing that I noticed that was consistent throughout a few of the films was that in this era they hung their pictures, paintings and portraits from ribbons and bows.

I loved this look and so I hung photos in my hallways in this style.

I purchased 4 different 4x6 frames from Homesense, non of which are made to hang on the wall, and then I attached black ribbed ribbon to each photo (by tying a not at the ends of the ribbon and slipping them under the hinges on the back of the frame). I glued and duck taped overtop of the ribbon on the back just to be sure the frames wouldn't fall.

I then tied little bows out of the same ribbon and put a small amount of hot glue on the back of them and stuck them to the end of the nail once the photos was already handing on it.
I got the "Home is Where Our Story Begins" wall decal from Dollarama for $2.00 and then I hung the four photos underneath it.

The photos are of our home in Spring, Summer, Fall and Winter. Before printing the photos I placed the season words on each of the photos in photoshop as well.

It gives the hallway a classic Victorian feel and being a small space the 4x6 frames don't overpower it.

Here are some photos of how it looks:


Here are each of the seasonal photos of our home:

Wednesday, January 26, 2011

Paper Flowers |


I am decorating for a friend's upcoming baby shower!

She decorated her baby's room in pinks and purples so that is the inspiration I took for the theme of her shower.

While at Michaels I picked up various pink and purple items thinking about how they could come together for centerpieces.

I decided to make flower pots and so once I got home I looked up 'How to make paper flowers' as I thought they would compliment the supplies I had already purchased.

I came across this You Tube Video that showed how to fold paper in order to cut out a flower shape. I did not follow the rest of her craft idea, I simply used her method of cutting out flowers.

I made three different sized flower shapes (following her method) for each flower that I made. I then crinkled some of the layers with my paper crinkler as well as frayed some of the edges to give them personality.

I then overlay the three different sized flowers (that were all made out of different coloured/patterned scrapbook paper) and I glued them together, gluing a button in the centre of each flower as well, giving them a cute whimsical look.

I then glued the paper flowers onto foam flower shapes that I bought in a pack at Michaels.

I double sided the foam flowers (as these centerpieces will be on round tables with both sides being seen) and I placed fabric baby stickers on the 'back' of the flower, I found these cute stickers at a local dollar store.

I used purple feathers to look like the leaves of the flower and I used a wooden skewer as the stem of the flower. I stuck the skewer into floral foam inside the little purple pail and then I covered the foam with the pretty pink basket stuffing.

I then glued on a "It's a Girl" ribbon around the pail along with a little bow of ribbon.

Overall I think they turned out really cute, and they really have a cute 'baby girl' shower flare to them!

It was really fun to make the paper flowers and they look really nice. I am thinking about starting to offer them as 'boutonnieres' for people's weddings. They would really be unique and custom looking and would be more cost effective then buying real flower boutonnieres.

Here are some photos of how the centrepieces turned out!

Thursday, November 11, 2010

Wreath Re-Creation |

I use the same grape vine wreath for every season. I simply change out the ribbon and folliage that I place on it.

Christmas 2009:
Summer 2010: Fall 2010: Christmas 2010:

Winter 2010:


I have also made an Easter wreath using branches of pastel colour eggs, a colorful summer wreath with plad ribbon and fruit, as well as a Valentines Day wreath using heart garland and a felt 'Love' word. (I don't have pictures of those wreaths).

Using a grape vine wreath with simple additions to it is an inexpensive way have a wreath for every season!

Tuesday, November 9, 2010

Newspaper Style Save The Date |

My newest Etsy shop offering if a newspaper style save the date.

These save the dates are not only adorable and vintage looking but are also great save the dates because your guests will get more information than just the typical 'date' and "formal invitation to follow" message.
With these save the dates your guests get a story outlining the places and locations of your wedding day, how you got engaged, some information about the style and theme of your wedding and even a quote from your as a couple describing what you are most looking forward to about your big day.
Make your save the dates more fun, exciting and personal!

I recently had a request to include the new york sky line on a couple's save the date as well as a map of the park where they will be getting married!

Contact me with your unique ideas for your save the date by visitng my Etsy Shop.
Simply Click HERE to vist the Save the Date Newspaper listing to get started.


Monday, October 25, 2010

DIY Vintage Greeting Cards |

Why not use vintage photos of yourself / your family growing up to make greeting cards out of?

For example here is a picture of myself dressed as a piglet and my brother dressed as a cheetah for Halloween and I used this photo to make a card for my mom.

Simply find some of your old seasonal photos (Christmas, Easter, Halloween, Birthday etc.) and scan them into your computer. Then you can simply print out the photo to use on the front of a homemade card, or you can write your message right on the image using a program on your computer with a text option.

Here is an old photo of my brother at his birthday that I made into a birthday greeting:

And here is another picture of my brother that could I made into a note card that could be used for anything:


And here is a photo of my dad & brother building a snow man when he was two that can be used as a Christmas Card:


Vintage photo cards are SO popular right now - so why not make your own for a fraction of the cost and have more meaningful cards at the same time!!


Wednesday, October 20, 2010

SEW Sweet |

Some Sweet and Spooky Vintage Sewing Patterns


Cozy Tea |

My tea cozy arrived and I am thrilled with it.
It is even more beautiful than I thought it would be!

Here is it, and its really working to keep my tea nice and warm.


Tea Cozy made by APT

Monday, October 4, 2010

Now my Tea will be Cozy |


This beautiful tea cozy was made by Anne in the UK who 'up-cycled' some old cross stitched linens that her 'Gran' had embroidered.

When looking for a tea cozy on Etsy I came across Anne's Shop 'AP Textiles' and I just couldn't resist ordering her tea cozy (even though I had four others that I was considering).

I just loved it for several reasons:

- Old things are made well
- Old things are made with love and care
- Old things being re-used are good for the planet
- Old things never go out of style
and most of all because
- Old things have a story

Anne said it took her awhile to convince herself to cut up her Gran's old linens to make something new with them, but she also said that her Gran would be thrilled to know that her old handiwork was "On its way to Canada".

Thanks Anne, I can't wait to receive it and to get years of use out of it!
I know it will make my tea pot feel really 'Cozy'!!


Related Posts Plugin for WordPress, Blogger...

The Before & Afters of our Home


Home Improvements Slide Show

Click on the slideshow to open up a 'Gallery' mode where you can scroll through the images.

"Befores" - Images of our home when we bought it

In Front Of Our New Home!

In Front Of Our New Home!

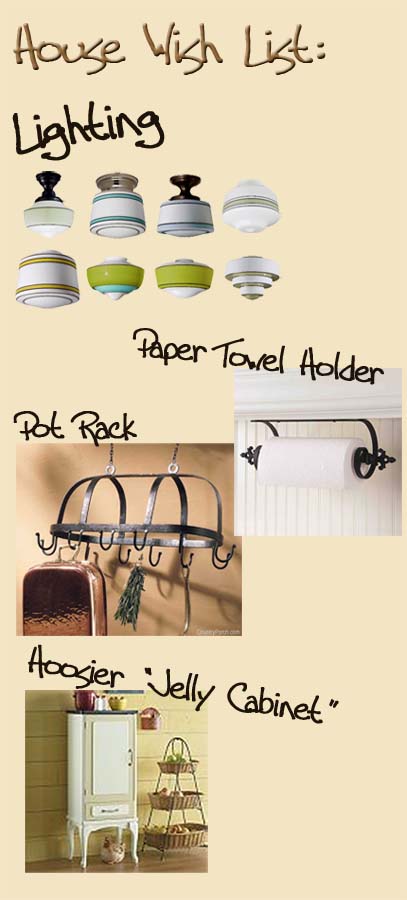
Wish List For Our Home:

Wish List For Our Home:

Our New Home Songs |